Want to boost blog subscribers and grow a thriving email list? It’s not just about hoping visitors stick around — it’s about turning casual readers into loyal fans.
The secret weapon? An irresistible lead magnet. These freebies — like checklists, ebooks, or video series — offer value in exchange for an email, making it easier to build a strong, engaged community.
Let’s break down how the right lead magnet can supercharge your blog’s subscriber count.
Tactics for Crafting Irresistible Lead Magnets
1. Create a Lead Magnet That Solves a Real Problem

This is the golden rule of lead magnets: they need to be valuable. When I first started, I made the mistake of offering a generic “Subscribe for Updates” form, which, let’s be real, isn’t that exciting. But once I created a lead magnet focused on a real problem my audience faced—like a “30-Day Blog Content Planner”—my subscribers shot up.
Pro Tip: Use surveys, comments, and Google Analytics to figure out what your audience is struggling with. Create a lead magnet that gives them a quick win, like a checklist or a cheat sheet. The more relevant it is, the more likely they’ll subscribe.
2. Keep It Simple and Actionable

One thing I learned? Short and simple lead magnets often work best in efforts to boost blog subscribers. I remember creating a massive eBook thinking it would impress everyone, but turns out, it was overwhelming. My subscribers preferred something they could digest quickly and use right away.
For example, a “5-Minute SEO Checklist for Beginners” outperformed that eBook by a mile. Think templates, cheat sheets, or short guides. Not only are they faster to create, but they also provide instant value.
3. Place Your Opt-in Form in Strategic Spots
Sometimes, it’s not the lead magnet itself, but where you place it that makes a difference. In the beginning, I only had one opt-in form at the end of each post, hoping people would scroll down and find it. Turns out, most readers missed it entirely.
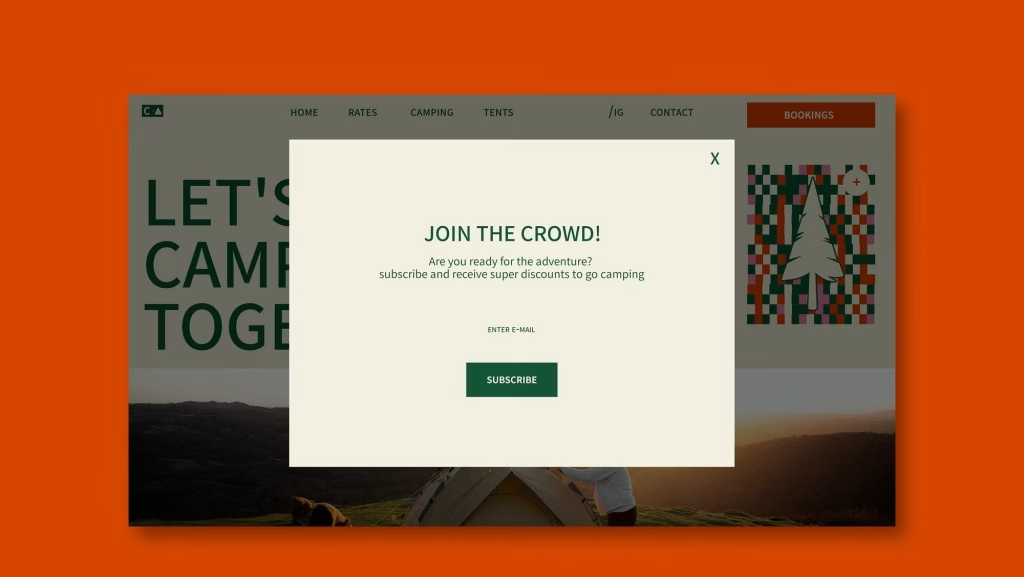
Now, I use multiple sign-up forms: a pop-up, an embedded form in the blog post, and even an exit-intent pop-up (one that shows up when readers are about to leave). This increased my subscriber rate by about 20% in just a few weeks.
4. Use Eye-Catching Visuals and Strong CTAs
Let’s be honest—an opt-in form is competing with all the other content on your page. If it’s not eye-catching, people will scroll right past it. I started experimenting with brighter colors, bold fonts, and clear call-to-action buttons like “Get Your Free Guide” instead of the standard “Subscribe Now.” The difference was immediate.
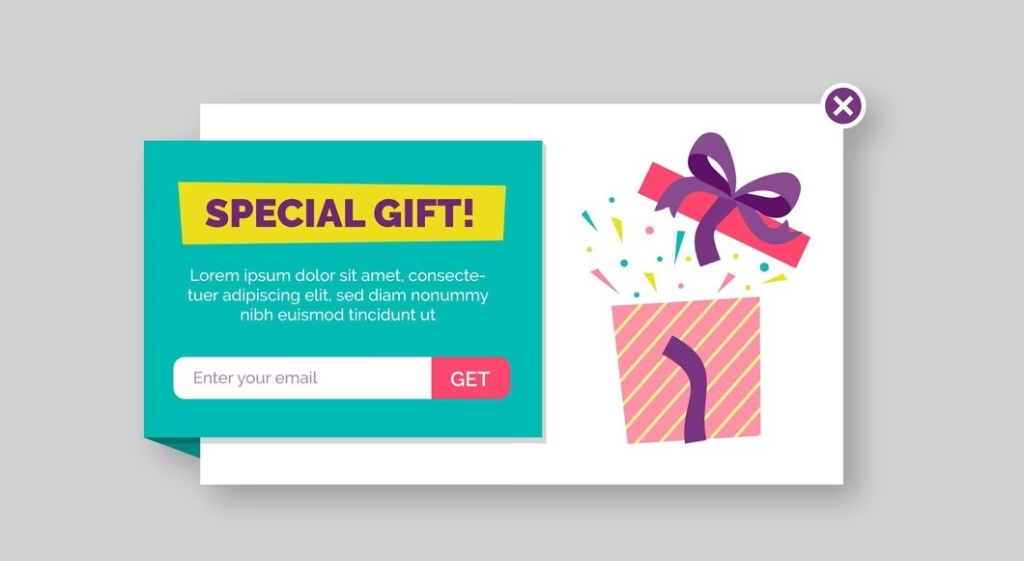
Tools like Canva make it super easy to design visuals, and services like Thrive Leads offer customizable forms that don’t require any design skills.
Discover The Secrets to Writing Effective Call-to-Actions in 2025
5. Test, Tweak, and Repeat
One thing I wish I’d known earlier is that lead magnets aren’t “set it and forget it.” What works one month might not work the next. I started tracking my opt-in rates and testing different versions of my lead magnets—a new title here, a different image there. Small changes led to big improvements.

Using tools like OptinMonster or A/B testing plugins, I’ve been able to find what resonates best with my audience. It’s a bit of trial and error, but every tweak brings you closer to that perfect magnet that boosts the blog subscribers list.
6. Follow Up with a Warm Welcome Series
Once someone signs up, the job’s not over. It’s essential to send a welcome email (or even a series) to keep them engaged. When I started doing this, I noticed people stayed on my list longer and even responded to my emails.

Use this opportunity to introduce yourself, highlight popular posts, or share a special resource. Email services like Beehiiv or Mailchimp make it easy to automate this process, so you can stay connected without lifting a finger.
7. Leverage Social Proof to Build Credibility
Social proof is a powerful tool. If readers see that others are signing up for your lead magnet, they’re more likely to do the same. When I started showing how many people had downloaded my lead magnets (e.g., “Join 5,000+ other bloggers!”), sign-ups noticeably increased. Adding testimonials from existing subscribers can also make your opt-in form feel more trustworthy and appealing.

Tip: If you’re just starting, ask a few friends or early followers to try out your lead magnet and leave feedback that you can use as social proof on your sign-up form.
8. Offer a Content Upgrade for Popular Blog Posts
A content upgrade is a lead magnet specifically tailored to the content of a particular blog post. If you have a post that’s getting a lot of traffic, adding a related lead magnet to that post can turn one-time readers into subscribers.

For example, I added a “Free SEO Content Calendar” to one of my high-traffic SEO posts, and the results were instant—conversion rates on that post tripled!
Tip: Identify your top-performing posts in Google Analytics and create mini lead magnets specifically for them, like downloadable templates, worksheets, or checklists.
9. Use FOMO (Fear of Missing Out) with Limited-Time Offers
Creating a sense of urgency can encourage readers to sign up right away rather than waiting. I experimented with a “Limited-Time Free Guide” banner for one of my lead magnets, and it surprisingly increased sign-ups.

It’s human nature—people don’t want to miss out on something valuable, especially if it’s free!
Tip: Try adding language like “limited-time offer” or “available only for a short time” to your lead magnets. You can automate this with tools like Deadline Funnel to set up timed offers or countdowns.
10. Collaborate with Other Bloggers to Cross-Promote
Collaborating with other bloggers is an often-overlooked trick to boost blog subscribers. I once partnered with a blogger in a similar niche and we created a co-branded lead magnet together—a “Beginner’s Guide to Monetizing Your Blog.”

We each shared it with our audiences, which introduced new readers to both of us and helped us grow our lists significantly.
Tip: Look for bloggers in your niche who complement your content and have a similar audience size. Co-create a resource or offer a guest lead magnet on each other’s sites. It’s a win-win for both of you.
Conclusion
The beauty of lead magnets is that they allow you to provide real value to your readers while you build and boost blog subscribers’ email lists. Experiment with these ten tricks—social proof, content upgrades, limited-time offers, and collaborations—and you’ll see the subscriber numbers move.
Every little tweak can have a big impact, so stay consistent, keep testing, and always be thinking of new ways to provide value to your audience. With these tips, you’re well on your way to a thriving email list and a more engaged audience.
FAQs
1. How do I come up with lead magnet ideas for my blog?
Start by identifying your audience’s most pressing problems and pain points. Ask yourself:
- What challenges do they face?
- What information, resources, or tools would they find genuinely valuable?
Pro Tips:
- Analyze your top-performing blog posts for inspiration. Repurpose or expand on that content.
- Use tools like Google Analytics or BuzzSumo to identify popular topics in your niche.
- Conduct surveys or interviews to get direct feedback from your readers.
Example: If your blog is about productivity, a lead magnet like “The Ultimate Time-Blocking Template” could resonate with your audience.
2. How do I create the lead magnet content?
The format of your lead magnet depends on the type of content you’re providing. Here’s how to create different types:
- Ebooks or Guides: Use tools like Canva, Google Docs, or Microsoft Word.
- Checklists and Templates: Create these in spreadsheet or document formats.
- Video Series or Webinars: Use screen recording tools like Loom or editing software like Camtasia.
Pro Tip: Ensure your lead magnet is visually appealing, well-structured, and easy to consume. Use headings, bullet points, and visuals to break up text.
3. Where should I promote my lead magnet on my blog?
Strategic placement is key to maximizing sign-ups. Consider these options:
- Sidebar or Header: Add a prominent call-to-action (CTA) that’s always visible.
- Dedicated Landing Pages: Create a standalone page for your lead magnet.
- Pop-ups or Exit-Intent Offers: Capture attention before visitors leave your site.
- In-Content CTAs: Mention your lead magnet contextually within blog posts.
Pro Tip: Use tools like OptinMonster or Thrive Leads to create and manage these placements.
4. How do I ensure my lead magnet stands out?
To make your lead magnet irresistible to help boost blog subscribers:
- Focus on a specific problem your audience faces.
- Use a catchy title that highlights the benefits.
- Include social proof, like testimonials or statistics.
- Make it actionable and easy to implement.
Example: Instead of “SEO Tips,” use “10 SEO Hacks to Double Your Traffic in 30 Days.”
5. How often should I update my lead magnets?
Regular updates keep your lead magnets relevant and valuable. Aim to:
- Update yearly to reflect industry changes.
- Refresh designs and formats to maintain a modern look.
- Add new insights or data to keep the content fresh.
Pro Tip: Use analytics to track engagement and identify areas for improvement.
6. Can I use multiple lead magnets on my blog?
Yes! Using multiple lead magnets allows you to target different segments of your audience. For example:
- A free checklist for beginners.
- An advanced guide for experienced readers.
- A video tutorial for visual learners.
Pro Tip: Use content upgrades—lead magnets tailored to specific blog posts—to increase relevance and conversions.
7. How do I track the performance of my lead magnets?
Use analytics tools to measure:
- Conversion Rates: The percentage of visitors who sign up.
- Traffic Sources: Where your leads are coming from.
- Engagement Metrics: How subscribers interact with your emails.
Pro Tip: Set up Google Analytics goals or use your email service provider’s built-in analytics.
8. What’s the best way to deliver my lead magnet?
Automate the delivery process to ensure a seamless experience:
- Use your email service provider (ESP) to send the lead magnet immediately after sign-up.
- Include a thank-you page with a direct download link.
- Ensure the file is mobile-friendly and easy to access.
Pro Tip: Test the delivery process to ensure it works flawlessly.
9. How do I avoid overwhelming my subscribers?
Respect your subscribers’ inboxes by:
- Sending a welcome sequence instead of bombarding them with emails.
- Provide clear expectations about how often you’ll email them.
- Offering unsubscribe options to maintain trust.
Pro Tip: Use segmentation to send targeted, relevant content.
10. What’s the biggest mistake to avoid with lead magnets?
The biggest mistake is creating a lead magnet that doesn’t deliver value when trying to boost the blog subscribers list. Avoid:
- Overpromising and underdelivering.
- Using generic or outdated content.
- Making the lead magnet too complex or difficult to use.
Pro Tip: Always test your lead magnet with a small group before launching it widely.


